four note friday 2.23 | The First Four Steps of a Photovoice Project
We're going to take a few steps back this week to outline the first four steps of a photovoice project. I realize the word steps can feel a bit rigid. But these steps can be seen as guideposts and mere suggestions to help with total project conceptualization. Photovoice is inherently flexible. If you need to adjust, adjust.
In my book on the photovoice methodology—situated within the context of education—I fully outline each of the steps. Since that book was written, I have thought a bit differently about the steps and that rethinking will come through here. I am now using gerunds—verbs that function as nouns—to suggest that each step is alive, active, iterative, and porous.
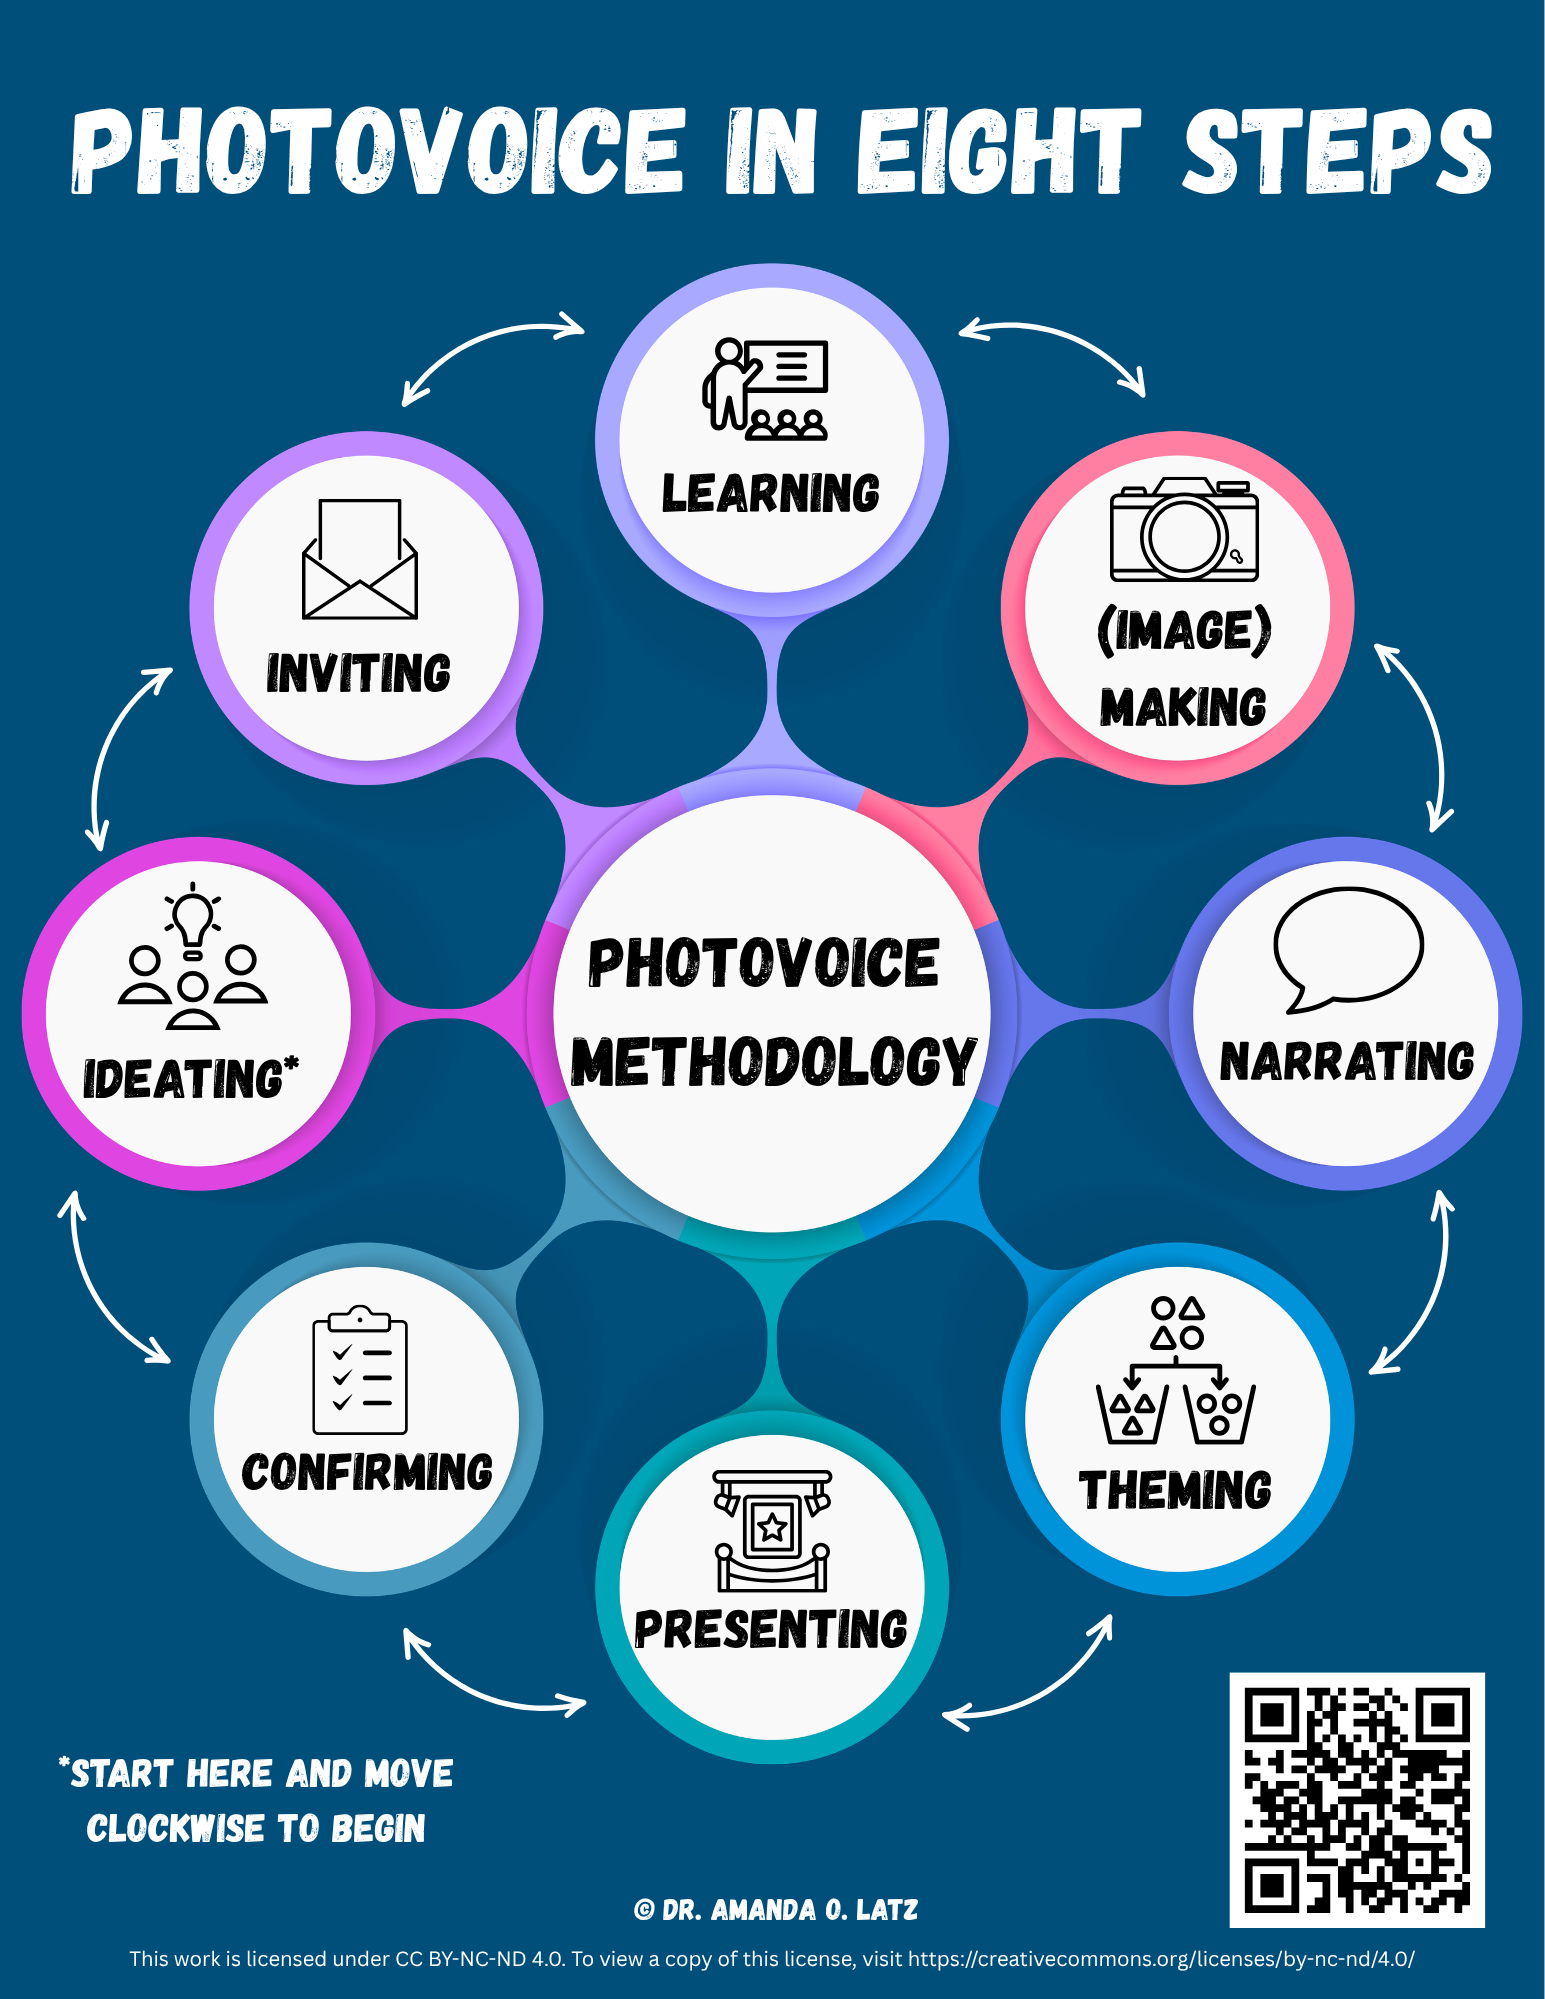
The full eight steps are as follows: ideating, inviting, learning, (image) making, narrating, theming, presenting, and confirming. Within this post, we are going to explore the first four steps. In each of the four notes below, I will define the step, provide some reflection questions for you to consider relative to the step, and explain how you might engage with collaborators using the power of menus within the step.
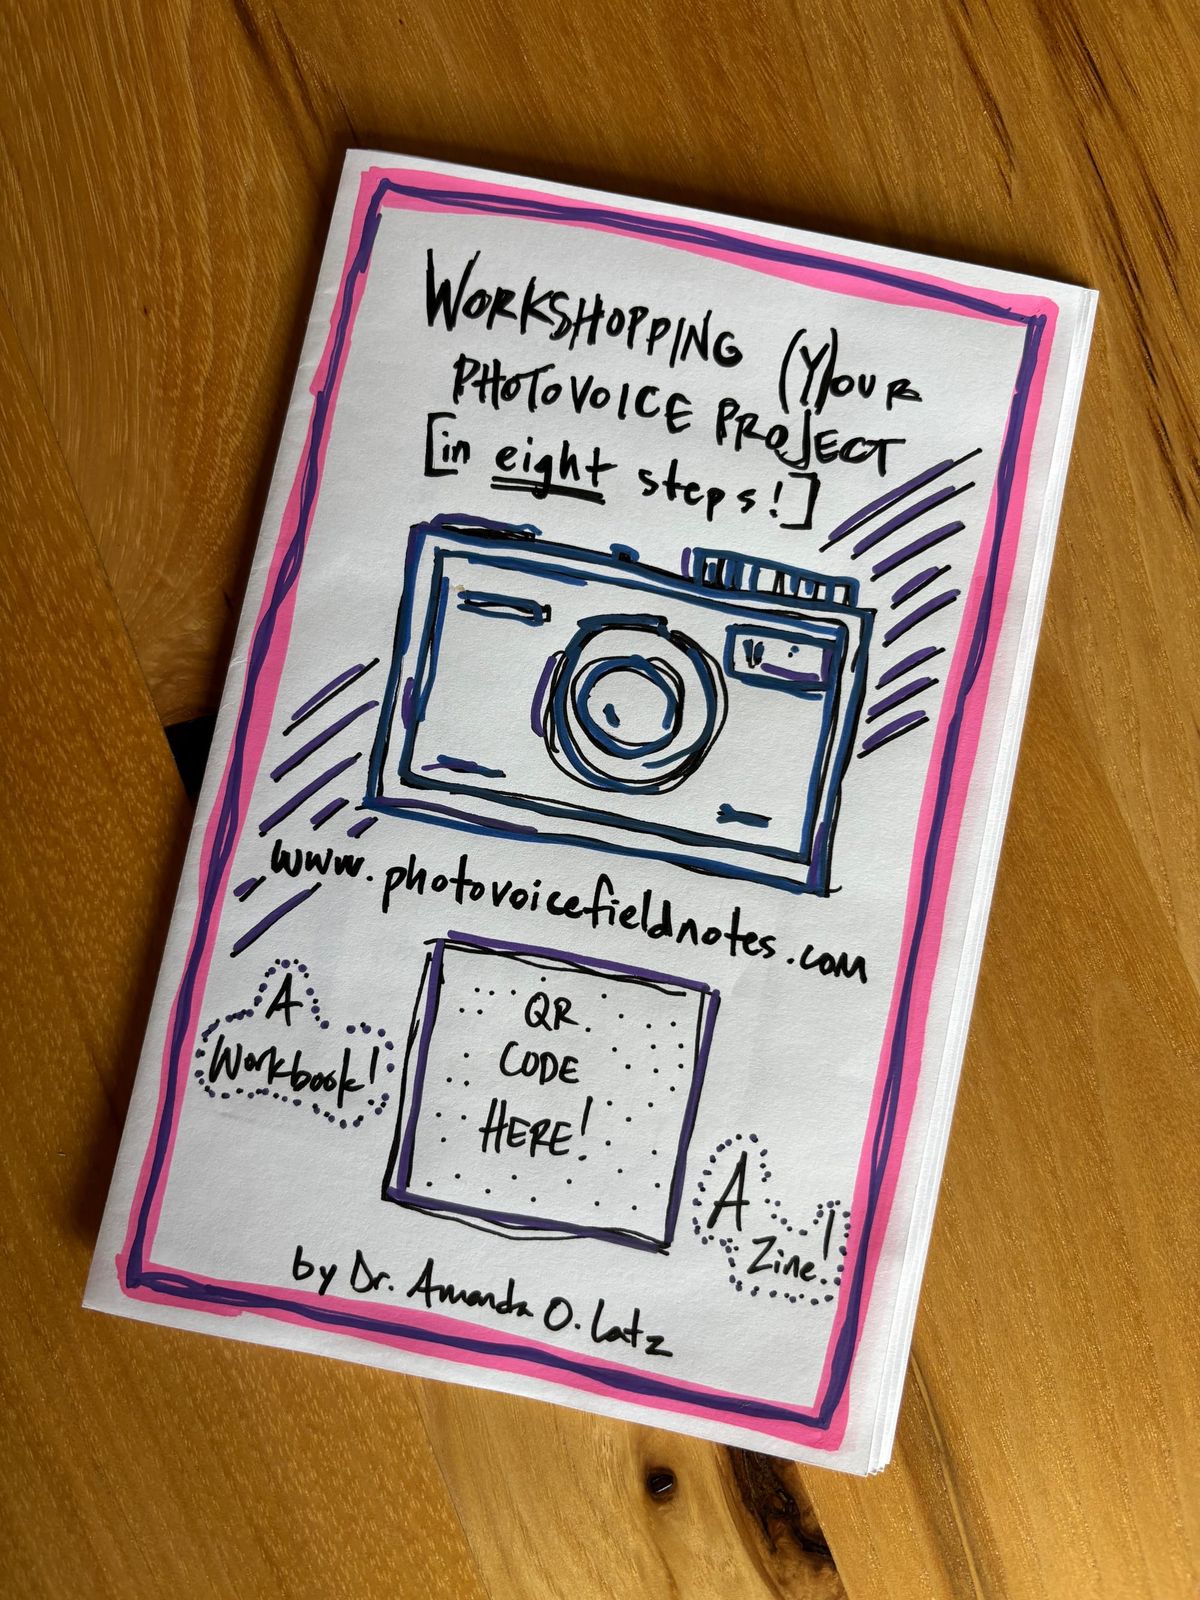
Before diving in, below is a graphic and digital download featuring the full eight steps that make up the photovoice methodology. Oh, and the above image is a cover prototype for a workbook/zine I am currently working on. More on that in time.
Step 1. Ideating
The first step in the process is figuring out the focus of the project and building a strong foundation upon which the work will be created. Project ideation may involve daydreaming, journaling or reflective writing, reading widely, having conversations with other people, and simply noticing things as you go about life. If you are at the point where you want to facilitate such a project, consider all the things that got you to that point as a springboard for ideating.
Since I began my doctoral studies 20 years ago, I have wanted the stories of community college students to be known by the widest audience possible. My belief is and was that if more people knew these stories, good things might result.
That was the starting point from which my very first photovoice project grew. And from that point, I had to work on the foundation of the project. And foundation building is no easy task. I ideated for quite a while. And once I landed on my topic, I had to conceptualize the entire project (i.e., compose a full dissertation proposal) before going through the ethics clearance/approval process through my institutional review board (IRB).
The ideation step includes deciding on a topic, reviewing the relevant literature/information to build deeper understandings, crafting a research question or questions, considering participant/collaborator/co-researcher eligibility criteria, writing up consent and media release forms, drafting photography prompts, drafting a semi-structured interview or focus group protocol, making initial decisions about analysis, thinking through appropriate means of exhibition, and considering the policy landscape related to the topic.
As is now evident, the ideating step is a big one. Take your time. Be intentional. Strong preparation and having a solid plan in place makes the inevitable improvisation that comes with the research process much easier.
Reflection questions to consider during the ideating phase:
+ Why is this project important?
+ What is the topic of this study?
+ What is the problem associated with this study?
+ What is the purpose of this study?
+ Who should be involved with this project?
+ What logistical steps need to be considered?
+ How can I secure funding for this project?
+ What do I need to learn more about or understand better to do this project well?
+ What materials must be prepared to submit the project for ethics approval?
+ What specific policy is this project meant to address?
Ways to leverage menus to invite participation during the ideating phase:
During the ideation phase, it is sometimes vital to engage with others—especially potential participants/collaborators/co-researchers—to gain additional perspectives and ideas about the work. Rather than going into these engagements with no pre-thought out possibilities, go in prepared. Menus can be terrific conversation starters and entry points for project refinement. Items on the menu are suggestions, however. In this context and using a restaurant metaphor, meals are cooked to order. Here are some menu-building prompts to use during the ideating step. Bring these menus to the potential participants/collaborators/co-researchers and follow their lead(s).
+ List three potential topics are you considering.
+ List three communities or groups of people impacted by or most knowledgeable about the topic or problem.
+ List three potential sources of funding.
+ List three policies your project might have a chance of meaningfully affecting.
+ List three policy makers or offices/departments/units/entities you could consult about the work.
+ Build three strategies, plans, or schedules you might put in place to prepare for ethics approval.
+ List all the items necessary to include in the ethics approval package.
Step 2. Inviting
The second step in the process is inviting. Once the ideating phase has given way to a solid work foundation—plans made, ethics approval granted—it is time to begin. But before going on, it is important to note here that inviting may also occur as part of the ideating phase. For example, you may want to invite potential project partners, community leaders, and/or policy makers close to the topic into a meeting to discuss possibilities for the work. These steps are not completely discrete, and some level of overlap is to be expected.
The main task of this step is inviting participants/collaborators/co-researchers to the study. Inviting means recruiting folks to join the study. During the ideating phase, consideration should be given to scope and scale, which can give an indication of how many people should, or can, be involved.
When considering a reasonable number of folks to invite, think about feasibility, richness and volume of potential data, the team's capacity, and the nature of the evidence that might be necessary to instigate change. There is no magic number or range here. Canvassing the literature will give you a sense of what works, but considering the uniqueness of your project is key.
Reflection questions to consider during the inviting phase:
+ What is the most effective way to spread the word about the study and recruit participants?
+ What kinds of incentives or payments should I provide participants—if any?
+ Who could I reach out to for help with the recruitment process?
+ How might I most appropriately and effectively word the explanation of the project for potential participants?
+ How will potential participants indicate their interest?
Ways to leverage menus to invite participation during the inviting phase:
Again, using menus as springboards for conversations with others, including—and most importantly—prospective participants/collaborators/co-researchers, during the inviting step is key for making the project participatory. It is also a way to make the work legible to those with whom you would like to work.
+ List all the ways you might spread the word about the study and recruit participants.
+ Draft three versions of your recruitment messaging.
+ List three people who might lend you credibility throughout the inviting step. In other words, who might help amplify your call for participants?
+ List three ways for participants to indicate interest in participating (e.g., phone call, survey response, email).
Step 3. Learning
The third step in the process is learning. You have a group of participants ready to dive in. Consent and media release forms are ready for signature. Photography prompts have been built or are in the process of revision and refinement. Now it is time for prospective participants/collaborators/co-researchers to learn all about the project and what actions they will take next. It is also a time for you to learn—to learn about the people with whom you'll be on this journey alongside. Again, these steps are not discrete. All steps will likely involve ideation. This step may involve prospective participants/collaborators/co-researchers attrition, so inviting may have to occur in several rounds.
Think of the learning step like prospective participants/collaborators/co-researchers orientation or onboarding. There is much to explain. Photovoice is far from a typical research methodology. Folks need to know what they are getting into. This will be a significant commitment of time, energy, and focus—and that reality must be shared up front. During this step, the following should be addressed (not likely an exhaustive list): project overview and aims; contents of the consent and media release forms; duration or timeline of the study; photography prompts; number of photographs to be created; photography parameters (i.e., no photographs of peoples' faces or anything illegal); camera usage; post-photography process; expectations regarding interviews, focus groups, captioning, or other means of generating voice to accompany the images; process for transferring images; and information about how to communicate with others throughout the duration of the study.
Reflection questions to consider during the learning phase:
+ How will you onboard or orient participants/collaborators/co-researchers to the study?
+ Will this occur online, in-person, one-on-one, in a large group, synchronously, asynchronously?
+ If applicable, what is necessary to promote attendance—a meal, snacks and drinks, childcare, transportation?
+ What materials will be needed during the learning phase (e.g., handouts, QR codes, slidedeck, instant cameras)?
+ How might additional input on the photography prompts be gathered and implemented during this step?
+ What will participants/collaborators/co-researchers use to take photographs?
+ How much time is needed for the (image) making step?
+ How will the photographs be turned in?
+ If applicable, how will incentives be delivered? And am I providing cash, gift cards, or something else?
Ways to leverage menus to invite participation during the learning phase:
Remember, everyone learns during this step (and all steps, really). And menus can be a part of that learning.
+ List all potential materials necessary for a successful orientation or onboard.
+ List three camera options.
+ List all potential photography prompts.
+ List all the possible ways to promote attendance.
+ List all the possible modalities for hosting the orientation or onboard.
+ List all the potential locations to host the orientation or onboard.
+ List three key tips related to effective photography (e.g., rule of thirds, use of flash).
+ List all the photography parameters you will put in place.
Step 4. (image) Making
The fourth step in the process is when the participants/collaborators/co-researchers create images in response to the photography prompts. This is the time when participants/collaborators/co-researchers think about the prompts and make decisions about how to respond visually.
This step should unfold within a specific period of time. Having a clearly communicated plan in place will make things go as smoothly as possible—though interesting things will always arise through the project's duration. Photography usually takes place on folks' own time, though in some instances dedicated photography sessions can be helpful. For example, organizing a photo walk through a particular area, building, or neighborhood can create a beautiful synergy between participants. Also, when working with youth in education contexts, dedicated time during the school day for photography may be appropriate.
Reflection questions to consider during the (image) making phase:
+ Is it necessary to define photograph for the participants/collaborators/co-researchers? Why, or why not?
+ What counts as a photograph (e.g., screenshots, slide from a slidedeck, heavily edited digital photographs)?
+ What is the most appropriate photographic objecthood for the images to be created (e.g., instant photographs, digital photographs, film photographs)?
+ What issues of safety should be top of mind during this time?
+ What potential problems might folks encounter during this time?
+ What is the easiest way for folks to transfer their photographs to me?
+ Will the photographs need to be saved, copied, scanned, printed, enlarged or otherwise edited, and/or cropped?
+ Where will the photographs be stored, and why?
+ How should the photographs be organized, and why?
+ Who has access to the photographs, and why?
+ What will happen if a participant would rather draw a picture in response to, make something in response to, or just talk about their responses to the photography prompts?
Ways to leverage menus to invite participation during the (image) making phase:
+ List all the things that count as a photograph.
+ List all the potential equipment necessary to enable this step.
+ List all the potential technology necessary to enable this step.
+ List three possible snags that could arise during this step—along with potential solutions.
+ List who will have access to the photographs.
+ List three ways to organize the photographs.
+ List three ways the photographs may need to be manipulated.
This post ended up being quite a long one—so thank you if you're still with me at this point. While photovoice might seem simple, easy, and unrigorous on the surface, it is anything but those three things. And I hope this post is a testament to that. Plus we are only halfway through the eight steps.
I would love to hear from you on this one. Do these first four steps track with your experiences? What might you tweak? What are your thoughts on the use of gerunds? Do the reflection questions and menu ideas track? Please know you are always encouraged to reach out.
🥹 Thanks for spending a moment with me this Friday.
💌 If you’re new here, welcome! I hope this space becomes one you look forward to each week.
📬 Have a question you want me to answer in a future issue? Reach me at photovoicefieldnotes@gmail.com. I'd love to hear from you.
Thanks for being here.
Warmly,
Mandy
photovoice field notes
photovoicefieldnotes.com